Free Knitting Patterns
Noro Silk Garden Scarf Pattern
© 2003 Karen Baumer 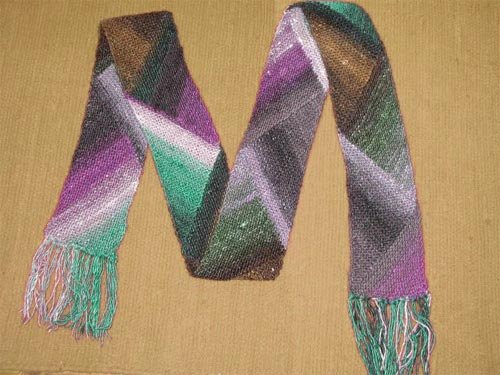
Materials
It takes approximately 200 yds. of yarn to make a 4’ scarf, 300 yds. to make a 6’ scarf. (Your exact mileage will depend on how heavy the yarn is and what needle size you choose.) Use all one yarn, or experiment with alternating among multiple yarns to get a striped or patchwork effect. Variegated and self-striping yarns are particularly well-suited for this project.
For a fairly solid-looking scarf, use the needle size recommended on the ball band of your chosen yarn. Go up a couple of needle sizes for a lacier-looking scarf.
Terms defined
Inc = knit into front and back of stitch
SSK = slip next two stitches individually as if to knit, put tip of left needle into slipped stitches and knit them together
SKP = slip one as if to knit, K1, pass slipped stitch over
Instructions
Cast on 1 st.
Row 1: Inc into stitch (2 sts)
Row 2: Inc into first stitch, K to end. (3 sts)
Repeat Row 2 until one side edge of your triangle (i.e., not the “live” edge on the needle) is as wide as you want your scarf. About 5” is good, but skinnier or wider works too—it’s up to you. Now start your short row sections:
Short Row Section:
Row 1: Inc, SSK (or SKP throughout, your choice), turn.
Row 2 and all even-numbered rows: Knit
Row 3: Inc, K1, SSK, turn.
Row 5: Inc, K2, SSK, turn.
Row 7: Inc, K3, SSK, turn.
Continue in this manner, increasing by one stitch in every odd-numbered row between the inc and the SSK (you won't actually need to count because you will always be SSK-ing the two stitches on either side of the gap that forms from your turn on the previous row).
Work until you've SSK-ed the last two stitches of the row.
Next Row: start over at Row 1 of the Short Row Section.
Continue working Short Row Sections until your scarf is almost as long as you want it. Once you have completed your final Short Row Section, proceed as follows--
Decrease Row: SKP, K to end.
Repeat Decrease Row (i.e., decrease at start of *every* row) until you have one stitch left. Snip yarn and bind off stitch.
Weave in ends and add fringe, if desired
Several people have pointed out that the final section of the pattern is not symmetrical with the rest of the triangles. Here is an alternate ending by Matthew Hesson-McInnis that addresses that issue:
For the last Triangle:
Work as with previous triangles until 1/2 of the stitches are on the right needle and 1/2 of the stitches remain on the left needle. Instead of starting each garter stitch ridge with an increase, start the ridge with a decrease (i.e., K1, k2tog). Continue to work the decrease in the "middle" of the row as before, and after making this second decrease, both needles will have the same number of sts. When 6 sts remain, work as follows:
K1, K3tog, turn, k2
k3tog, turn, k1
K2tog, cut yarn & pull through last remaining loop
© 2003 Karen Baumer
based in the UK

Contact Us | Site Map | Privacy and Security Policy | Knitting Blogs